

Git Commands You Need To Know Before Contributing to Open Source
By- Kaushal Joshi, Full Stack Developer


My First Contribution 🤗
My first open source contribution was pretty interesting. At first, I was anxious, afraid and full of self doubt of not knowing enough about the issue I was assigned to. What if I can't resolve this issue? What if my code caused some problems in their project? Is it okay if I googled when I get stuck, or will that be considered malpractice?
I was bombarded with self doubt and was going to throw away the idea of participating. Somehow I decided to take small steps and work on small issues first.
Then I was overwhelmed by GitHub commands. I knew very little about concepts like Fork and Upstream. The project's contribution guideline helped, But still, it took me two more projects to understand everything.
So here I am! Helping anyone who is struggling like I was. This blog explains some widely used commands while contributing to open source projects. It's okay if you don't know what it does yet. I have added brief information about every command and gave a few external resources at the end if you want to learn further.
Before you start 🤨
There is a high probability that you already know what Git, Version Control, GitHub and Open source means. but here are my two cents:
GitHub
In laymen's terms, GitHub is a version control system that allows us (developers👩💻) to save, share, restore and track our code. This platform is used by developers around the globe to share their work.
Open Source
This is well explained by opensource.com :
The term open source refers to something people can modify and share because its design is publicly accessible.
Open source software is a software whose source code is publically available and accessible by anyone. People can see the codebase, make copies, make changes or enhancements according to them.
To work on open source projects, you must be aware of few things. GitHub commands being one of them.
Assigning the Issue
Once you find an interesting project, go to the Issues tab.

Here, find an issue that matches your skillset and domain. Put a comment that tells the maintainer that you're interested in working on it. Wait for the maintainer to assign it to you. You can start working on resolving the issue after they assign it to you.
Git Commands ⚙
Fork
Forking a repo creates its copy in your GitHub account. You are supposed to work on the assigned issue on the forked copy and then merge new changes back to the original repo. Changes made in the forked repo don't affect the original repo until you make a pull request (we will get into that later).
You'd see a button on the upper right side of this page to fork this repo.
 You'd be redirected to your forked copy of the project.
Clone
Cloning is the process of creating a copy of the repo from your account to your local machine.
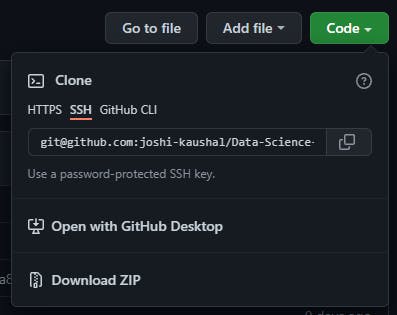
Click on the bright green Code button and click on copy.
Open your terminal and change its directory to desired project directory.
git clone https://github.com/<your-username>/<project-name>.git
cd <project-name>
Upstream
Upstream refers to the original repo that you forked earlier. You need to connect your cloned repo to the original one. This keeps track of changes being made in the original repo. By executing this command, we add a reference to the original repository.
git remote add upstream https://github.com/<maintainer-username>/<project-name>.git
New Branch
You can start working on the issue right away, but only devils work on master branch!
What if you mess up and want to delete every change you made? What if you get assigned to a new different issue in the same project? What if you want to see how the project was before you start changing the codebase?
You don't have to think about all these if you just create a new branch before you start working - like a normal human.
git checkout -b <branch-name>
The -b parameter automatically switches your code environment to the newly created branch.
Start working on your issue and push your code to your forked repo to track changes.
Track Changes
The changes you make are only in your local repo till now. If somehow the folder gets deleted, your progress is gone. It's a best practice to commit your changes to the forked repo after completed a significant part of your project.
Execute these commands in your terminal:
git add .
git commit -m"<relevant-message>"
git push -u origin <branch-name>
Your code is pushed to your forked remote branch.
the 'dot' after
git addadds every file from your local repo. While working on a big project, only add those files that are changed.
Pull Request
When you have resolved the issue, you need to create a Pull Request to merge your changes in the original repo. Remember, all the changes you are doing are getting committed in your forked repository till now.
Open your GitHub account from the website and open the forked repository. Follow these steps to create a pull request.
- Click on
Pull Requeststab. - Click
New Pull Request. - Verify the changes you made and then click
Create Pull Request. - Add an appropriate title and description to your pull request explaining your changes and efforts.
- Click on
Create Pull Request.
There might be some templates or guidelines you might have to follow while explaining what you did. Just check
README.mdorCONTRIBUTIONS.mdonce.
Merge Conflicts
Merge Conflicts arise when two or more developers have changed the same lines in the codebase. The change can be anything here - addition, deletion or updation of previous content.
Though Git resolves many types of conflicts on its own, there are few conflicts that git cannot automatically resolve.
If there are merge conflicts, don't panic! Try to resolve the issue or simply ask the maintainer to help :)
Congratulations 🎉
You have contributed to open source! It was easy, wasn't it? Now find new projects to work on and start working on different issues.
Finishing Up 👋
Summarizing what we did:
- Forked the original repo.
- Cloned it in our local machine.
- Added reference to the original repository.
- Created a new branch for each issue.
- Pushed our progress in the forked repo.
- Created a Pull Request to merge our changes with the original repo.
This was just a start and there is a lot to learn about this. I will share more content based on version control, GitHub and open source. But if you're impatient and want to learn it right now, Here are few links to start:
- Git & GitHub Tutorial for Beginners by The Net Ninja
- Complete Git and GitHub Tutorial by Kunal Kushwaha
- Introduction to Git and GitHub by Google
- Version Control with Git
Let me know if this blog helped you. And I would really love to hear about your experience of contributing to open source for the first time. I am active on Twitter and LinkedIn if you want to say Hello!
Happy Contributing! 🥳